Creating an addon domain in cPanel is a common task for website administrators who want to manage multiple domains from a single hosting account. An addon domain allows you to host a new domain and its associated website while using the same hosting plan and resources. This process is straightforward if you follow these steps.
1. Log In to cPanel
To begin, you need to access your cPanel account. Open your web browser and enter the cPanel URL provided by your hosting provider, usually something like https://yourdomain.com:2083 or https://domainnam.com/Cpanel Log in using the username and password you received from your hosting provider.

2. Locate the Addon Domains Section
Once logged in, you’ll be taken to the cPanel dashboard, which includes a variety of sections for managing different aspects of your shared hosting account. Look for the “Domains” section, which is typically found on the main page of cPanel. Within this section, click on the “Addon Domains” icon. This will take you to the page where you can manage and add new addon domains.

3. Enter the Domain Information
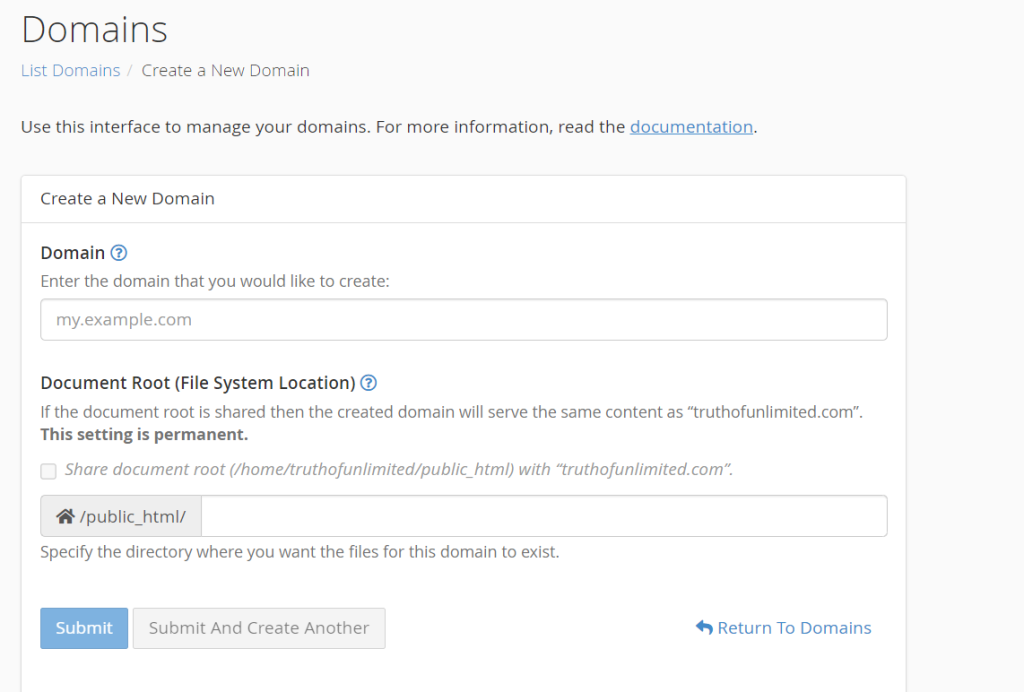
3) Click on the Create A New Domain button
On the Addon Domains page, you’ll see a form where you need to input the details of the domain you want to add. Here’s a breakdown of the fields you need to complete:

On the Addon Domains page, you’ll see a form where you need to input the details of the domain you want to add. Here’s a breakdown of the fields you need to complete:
- New Domain Name: Enter the domain name you want to add. This should be the fully qualified domain name (FQDN) without the “www” prefix, such as
example.com. Make sure this domain is registered and that you have access to its DNS settings. - Subdomain/FTP Username: cPanel will automatically generate a subdomain name based on the new domain name you enter. This subdomain is used to create a directory for your new domain. You can accept the default subdomain or modify it if needed. Additionally, this will be the username for an FTP account associated with the addon domain. You can change this username if you prefer.
- Document Root: This field specifies the directory on your server where the files for the new domain will be stored. By default, cPanel will create a folder in your public_html directory, named after the subdomain. You can change this path if needed, but it’s usually best to leave it as is unless you have specific requirements.
- Password: Enter a strong password for the FTP account associated with the addon domain. This is important for securing your domain’s files and ensuring that only authorized users can access them. You’ll need to re-enter the password to confirm it.
4. Add the Domain
After filling in the required information, click the “Add Domain” button. cPanel will then process your request and create the necessary directories and configurations for your new domain. This process may take a few moments.
5. Configure DNS Settings
Once the addon domain is added, you need to ensure that its DNS settings are correctly configured. Go to the domain registrar where you registered your new domain and update the DNS records to point to your hosting provider’s nameservers. This step is crucial for making sure that visitors to your new domain are directed to your hosting account.
- Nameservers: Typically, you’ll need to set your domain’s nameservers to those provided by your hosting company. They usually look like
ns1.yourhostingprovider.comandns2.yourhostingprovider.com. - Propagation: DNS changes can take up to 48 hours to propagate fully across the internet, though it often happens faster. During this time, your new domain may not be immediately accessible.
6. Upload Files and Test
With the domain added and DNS settings updated, you can now upload files to the directory created for your addon domain. You can use cPanel’s File Manager or an FTP client to upload your website files to the document root directory specified earlier.
Once you’ve uploaded your files, test your new domain by entering it into a web browser. If everything is set up correctly, you should see your website. If not, check your DNS settings and ensure that the document root directory contains the correct files.
7. Manage and Maintain
Managing an addon domain is similar to managing any other domain within cPanel. You can use tools provided in cPanel to manage email accounts, databases, and other features associated with the addon domain. Regularly update your website and monitor its performance to ensure it runs smoothly.
In summary, adding an addon domain in cPanel involves logging into cPanel, navigating to the Addon Domains section, entering domain details, and configuring DNS settings. Once set up, you can upload your website files and begin managing your new domain alongside your existing ones. This functionality is valuable for hosting multiple websites under a single hosting plan, simplifying domain management, and saving costs.